

getting started with after effects
After Effects, which is available with Adobe's Creative Cloud, is at the core at the majority of motion graphics, VFX and 3D artists and animators' workflows, because it offers a range of tools which can be adapted for a huge range of tasks from simple lower-thirds text and titles to full 3D stereo compositing for feature films.
- Get Adobe Creative Cloud
In many ways, After Effects is Photoshop but for moving footage, and, just like Photoshop, it can seem intimidating to new users and feel like your only ever using 10 per cent of the full power of the application.
But it's worth perservering. Because of the effective reduction in cost of After Effects (thanks to its inclusion in the Creative Cloud suite), it can offer a range of tools that can augment Photoshop and Illustrator. And as because it can import both PSD and AI files natively, your workflow should stay the same.
(For all the AE tutorials you could ever need, see our roundup of the best After Effects tutorials around).
Once I'd got over the initial 'hump' of learning where all the tools were, After Effects was one of the most creative applications I have ever used. Here are some of my top tips to help get the most out of this 'Jack of all Digital Trades'…
Projects and Compositions
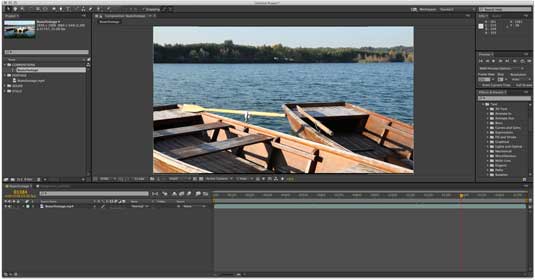
One of the initial challenges with After Effects is understanding the difference between Projects and Compositions. In After Effects there is only ever one project open, which acts as a container for all of the compositions and other files needed which are all situated and accessed in the Project Panel.
When saving an After Effects file, this is the Project file, which saves all the information regarding all the compositions contained within the project.
Get started
To make a new composition, use the Composition>New Composition menu item, which gives a panel for entering the settings required. If there's a file (or other composition) that could be used as a template for a new composition drag the chosen project element in the project window onto the small filmstrip icon at the bottom of the project panel.
This will make a new composition with the original elements settings and place the chosen element in the top layer of the new composition.
If external files, for example still images, animated or video footage have been imported, After Effects only references those files locations and does not save them with the project.
This can be problematic if sharing work with other designers or clients. Thankfully After Effects has an excellent File Manager in 'File>Dependencies Menu' which has a wide range of options to allow the moving and organisation of the source files with the master After Effects project file.
Layers
Getting to grips with layers and the timeline in After Effects is the key to unlocking the true power of After Effects. This is due to the fact that the majority of the animation controls are situated here such as keyframes, but also that there is a huge amount of 'hidden' functionality which is not immediately apparent.
Layers can be parented to one another via the small 'pickwick' or dropdown, which can be great for animating. Layers can be hidden from the timeline when not required via the 'shy' button. Animation curves are also available here for when fine control of animation falloffs are required.
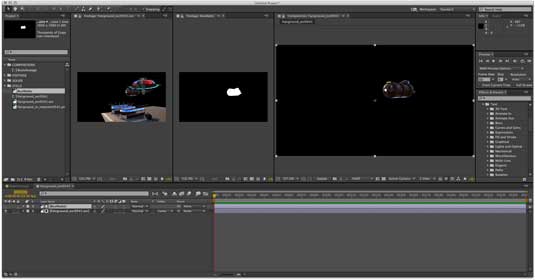
One of the most useful functions of layers is using footage or an object in one layer to act as a matte (or mask) for the layer beneath it. Place the layer to be used as a matte immediately above the content layer. On the content layer use the 'TrkMat' dropdown to choose how the mask layers should interact with the footage layer, either via transparency (Alpha) or image brightness (Luma).
Expressions

Another great feature which lives within a layer is expressions. Expressions are a simple scripting language which allows much more granular control of parenting a layers attributes to another in the same or different composition.
That is just scratching the surface of what is possible with expressions. Expressions can be used to control practically everything within After Effects from inputting text through to creating animation cycles which require no keyframes.
Expression attributes can be easily added once they have been enabled to a layer from a dropdown, and there is a wealth of resources and existing expressions online which can help both when deadlines are tight and as the syntax of After Effects expressions is reasonably clear, help in learning how to create your own expressions.
Animated typography
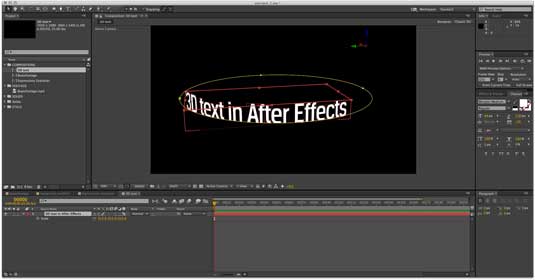
Creating kinetic typography with After Effects is great fun, with a powerful selection of bespoke animation tools when using the dedicated text object layer, it is easy to create a wide range of animations both in 2D and 3D because text in After Effects is able to follow 3D paths.
Do not worry if the effects controls seem counterintuitive, After Effects already comes with a wide range of text animations which can be applied by dragging them from the handy 'Effects and Presets' palette. To access the text animation effects go to the *Animation Presets>Text Menu and there is a huge range of animations to get going, which again be easily deconstructed to make your own.
Shape layers

Shape Layers in After Effects allow the creation of vector shapes, and with After Effects bezier tool selectors is 'almost' a mini Illustrator. To add a shape layer, either use the 'Layer>New Shape Layer' menu item, or press the rectangle shape in the tool bar to choose from a range of starter shapes. Make sure that there are no existing layers selected in the composition, as that will create a mask shape on the chosen layer rather than a shape layer.
Once a shape layer is created, it can be animated as if it was any other layer, but the real fun comes when you start adding the shape layer specific animation tools which are available when the shape layer are expanded in the timeline.
Among the options available are duplicating the path, jittering the stroke, puckering the line just as in Adobe Illustrator, and most importantly 'Trim the path' which allows the animation of the end and beginning of any shape or path. Multiple animations can be applied to a shape to create a unique look and animation really quickly.
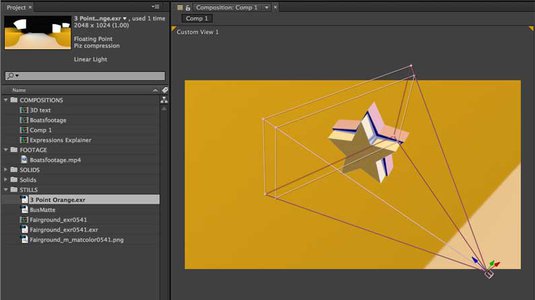
Working in 3D
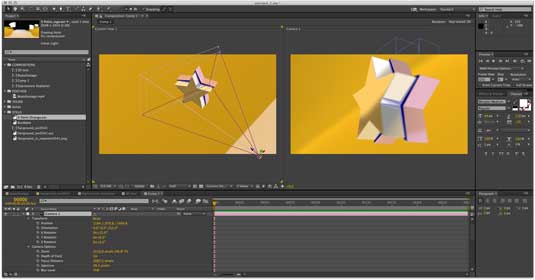
For a long time After Effects was a 2.5D application, which meant that it could manipulate flat layers in 3D space, but in the last couple of versions, it is possible to create true 3D objects based on splines or Shape Layers in After Effects and light it interactively using the After Effects lighting system.
3D in After Effects was given a major boost in the latest After Effects CC release with the inclusion of the Cineware plugin which creates true 3D files via the bundled Cinema 4D Lite application which comes bundled with After Effects, which creates 3D objects which can then be interacted with in the After Effects timeline.
There are a range of tracking tools such as the inbuilt 3D tracker and the bundled planar tracker mocha AE which can be used to pull 3D data from video files to enable the placing of 3D embossed text and 3D objects into video footage with ease. Finally After Effects also has a full stereo workflow to make your 3D, er… 3D!
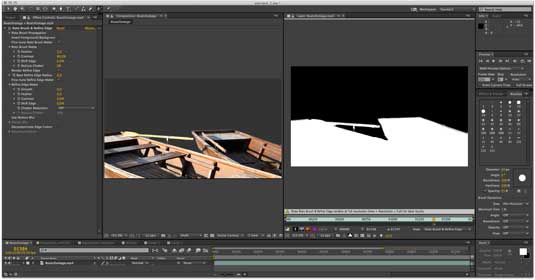
As well as motion graphics tools, such as the typography and shape layers. After Effects is also a visual effects powerhouse. One of the most important new tools to arrive in After Effects when creating VFX is the RotoBrush. Rotoscoping is the process of extracting elements from video footage or the cleaning footage of unwanted elements.
After Effects' Rotobrush speeds up what was time intensive process of masking, by allow the user to paint the area to be removed on one frame and then After Effects can extrapolate that through the rest of the footage. The 'Refine Edge' tool was added to the Rotobrush toolset in After Effects CC which has greatly improved the performance and accuracy of the RotoBrush, many times handling shots which will make you believe in magic, it chomps through tasks such as the extraction of wispy hair from a video plate in minutes rather than hours.
Plugins
One of the great things about Adobe switching to a subscription model is that when new features are ready they are added to applications rather than waiting for the next big point release. However there are still times when After Effects won't be able to do what is required for the job.
Instead of looking for another application, check out the huge range of After Effects plugins to see if you can find one that does what's needed. While it can be irritating paying for plugins, the functionality that they can offer can pay for itself. After Effects has a fantastic array of plugins for creating beautiful 3D particle systems such as the Form, Particular and Plexus.
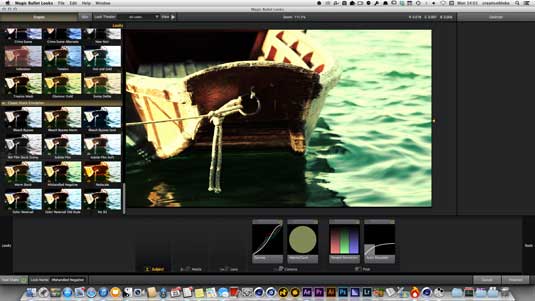
A plugin like Element 3D from VideoCoPilot can import and create photoreal 3D models allowing you to animate them directly in After Effects without needing to roundtrip with Cineware or other 3D Application. Then there are the colour tools such as Magic Bullet Looks which can change the way footage looks using a wonderfully intuitive interface. The list of plugins and what they can add to After Effects is practically endless.
One of the best places to start looking for plugins for After Effects is aescripts.com. This site collates a wide range of scripts from around the world, and the creators also write their own. Gems like BGrenderer which for $35 allows the render of After Effects composition more quickly than using the normal render dialogue while allowing you to still work in After Effects are more than worthy of the asking price!
Conclusion
Hopefully this quick guide has shown you what After Effects can add to a design workflow. The great thing about using After Effects is that once you dive in, it is one of the most 'fun' applications to work with. Very rarely is there a animation or VFX challenge which After Effects with its huge array of core tools and plugins can not handle.
Words: Mike Griggs
Mike Griggs is a freelance concept 3D, VFX and motion graphics artist working across TV, exhibition and digital design.
Liked this? Read these!
- Create a perfect mood board with these pro tips
- The best 3D movies of 2015
- Download free textures: high resolution and ready to use now
getting started with after effects
Source: https://www.creativebloq.com/after-effects/beginners-guide-11410328
Posted by: petersacal1959.blogspot.com
0 Response to "getting started with after effects"
Post a Comment