

How To Model In Cinema 4d
Learn step by step to model a spaceship in a simple way with Aarón Martínez
Cinema 4D is one of the most popular 3D modeling softwares on the market, thanks to the variety of options it offers and the freedom of creation that its tools allow. It is a program, however, that can intimidate beginners, due to its interface and professional appearance. But, once we learn how to handle it, it becomes an extraordinary ally in any type of 3D design.
Aarón Martínez (@aaronmartinez), designer and illustrator, shows us in this tutorial how to start modeling with the tools of Cinema 4D, creating a simple spacecraft shape that will help us understand the software much better. Find out more on the video below.

1. Choose the basic shape of the ship
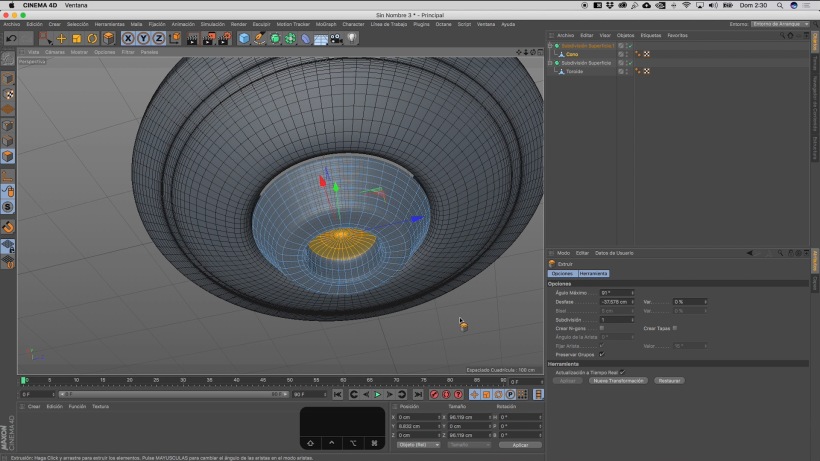
Start by choosing the base Object around which to build your ship. It can be a cube, a disc, a pyramid. Aaron has chosen a toroid. Then, in the Object tab, activate the segments, lower them to 6 and give them a rotation of 24. The next step will be to make the element editable and create a Subdivision Surface.

2. Work the shape of the ship
Go to Selection, then Loop Selection, and make the inner section of the toroid smaller. Then select the lines of the toroid and flatten the figure. From here on, you must continue selecting the lines or loops of the toroid, raising or lowering them to give the toroid more of a spaceship shape.

Go to Ring Selection and then to Mesh > Command > Connect. Now you can select the two new lines that have been created, and you will have to scale them up from Y. If you want to modify the outer edges of the ship, you can go back to Mesh > Command > Connect, select the line you want to delete, and hit Mesh > Command > Dissolve. Continue applying these commands to model the ship as you wish.

3. Apply details on the surface of the ship
In order to continue shaping the surface of the ship, we will have to extrude some of its parts. To do this, we select Cyclic Selection, go to Faces and choose Extrude Inner. We select the upper face of the ship, with a ring selection, and make the ring smaller. Finally, we extrude the selected ring. We apply the same process to the lower face of the ship.

4. Add the central part of the structure
Next, under Objects, we select the Cone. We place it inside the hole of the toroid and edit it to according to how we want it to look. We make it editable, and finally, with a right click, we choose Optimize.

To create an opening in the lower part of the ship, we go to the Cone and choose Loop Selection. We choose the central part of the Cone and apply Extrude Inner and finally we apply Extrude and deepen the central part of the Cone. By applying the processes we have detailed so far, we will be able to continue adding details to the Cone part of the ship.
5. Add the dome of the ship
We create a Circle and, in order to adjust it to the exact size of the upper opening of the ship, we use the measurements of the opening and, dividing the diameter by two, we obtain the radius that we have to apply to the Circle.
Then select the N-Side Vector, place it over the Circle and make it smaller. Add a path to the Vector and insert, using the menu on the right, both the Circle and the N-Side Vector into the path. You will get a bevel that will run along the outside of the dome and will fit the upper opening of the spaceship.


6. Add the ship's lights
Choose a Cylinder, place it on the dome of the ship and shrink it down. Lower the rotation segments to 12 and raise the height segments to 4. Optimize the cylinder with the right button, subdivide the surface and then select its top with the Loop selection. Apply Extrude Interior, reduce the circle by two steps and finally apply Extrude. Push it in and finally up. This will generate a small mound. Keep editing the light to get a dome shape.

Now, take the Cylinder out of the Surface Subdivision, remove the Subdivision and go to MoGraph > Clone. Three clones will appear vertically. Change the Mode to Radial and turn the lights 90 degrees with Shift. Increase the radius to move them away from each other and relocate them with Transform. All that's left is to lower them to the level of the ship's hull, where they'll be inserted without a problem. If you want to see the object more clearly, just turn off the lines.

7. Add the ship's tractor beam
If you want to add the typical spaceship beam, just select a Cone and model it to your liking on the bottom of the ship. Make it editable, go to Mesh and Centerline to change the Anchor Point of the beam to its upper part so you can customize it more easily.

If you liked this tutorial, learn more about creating compositions in Cinema 4D, integrating characters and typography, from the first sketch to the final render on Aarón Martínez's online course 3D Illustration with 4D Cinema.
You may also like:
- Introduction to Cinema 4D, a course by Francisco Cabezas
- Compositions with Cinema 4D and OctaneRender, a course by Aarón Martínez
- Design of Characters in Cinema 4D: from the Sketch to 3D Printing, a course by Aarón Martínez
How To Model In Cinema 4d
Source: https://www.domestika.org/en/blog/4134-cinema-4d-tutorial-modeling-from-simple-pieces
Posted by: petersacal1959.blogspot.com
0 Response to "How To Model In Cinema 4d"
Post a Comment